Building a Scalable API Testing Framework with Playwright
API testing often starts simple—a few scattered test files making direct HTTP calls. But as your application grows and your API surface expands, this approach quickly becomes a maintenance nightmare. You find yourself copying authentication logic, hardcoding URLs, and struggling to manage tests across multiple environments.
This guide walks through building a production-ready API testing framework using Playwright, based on real-world experience testing a financial trading API. We’ll transform chaotic, hard-to-maintain tests into a clean, scalable architecture that your entire team can contribute to confidently.
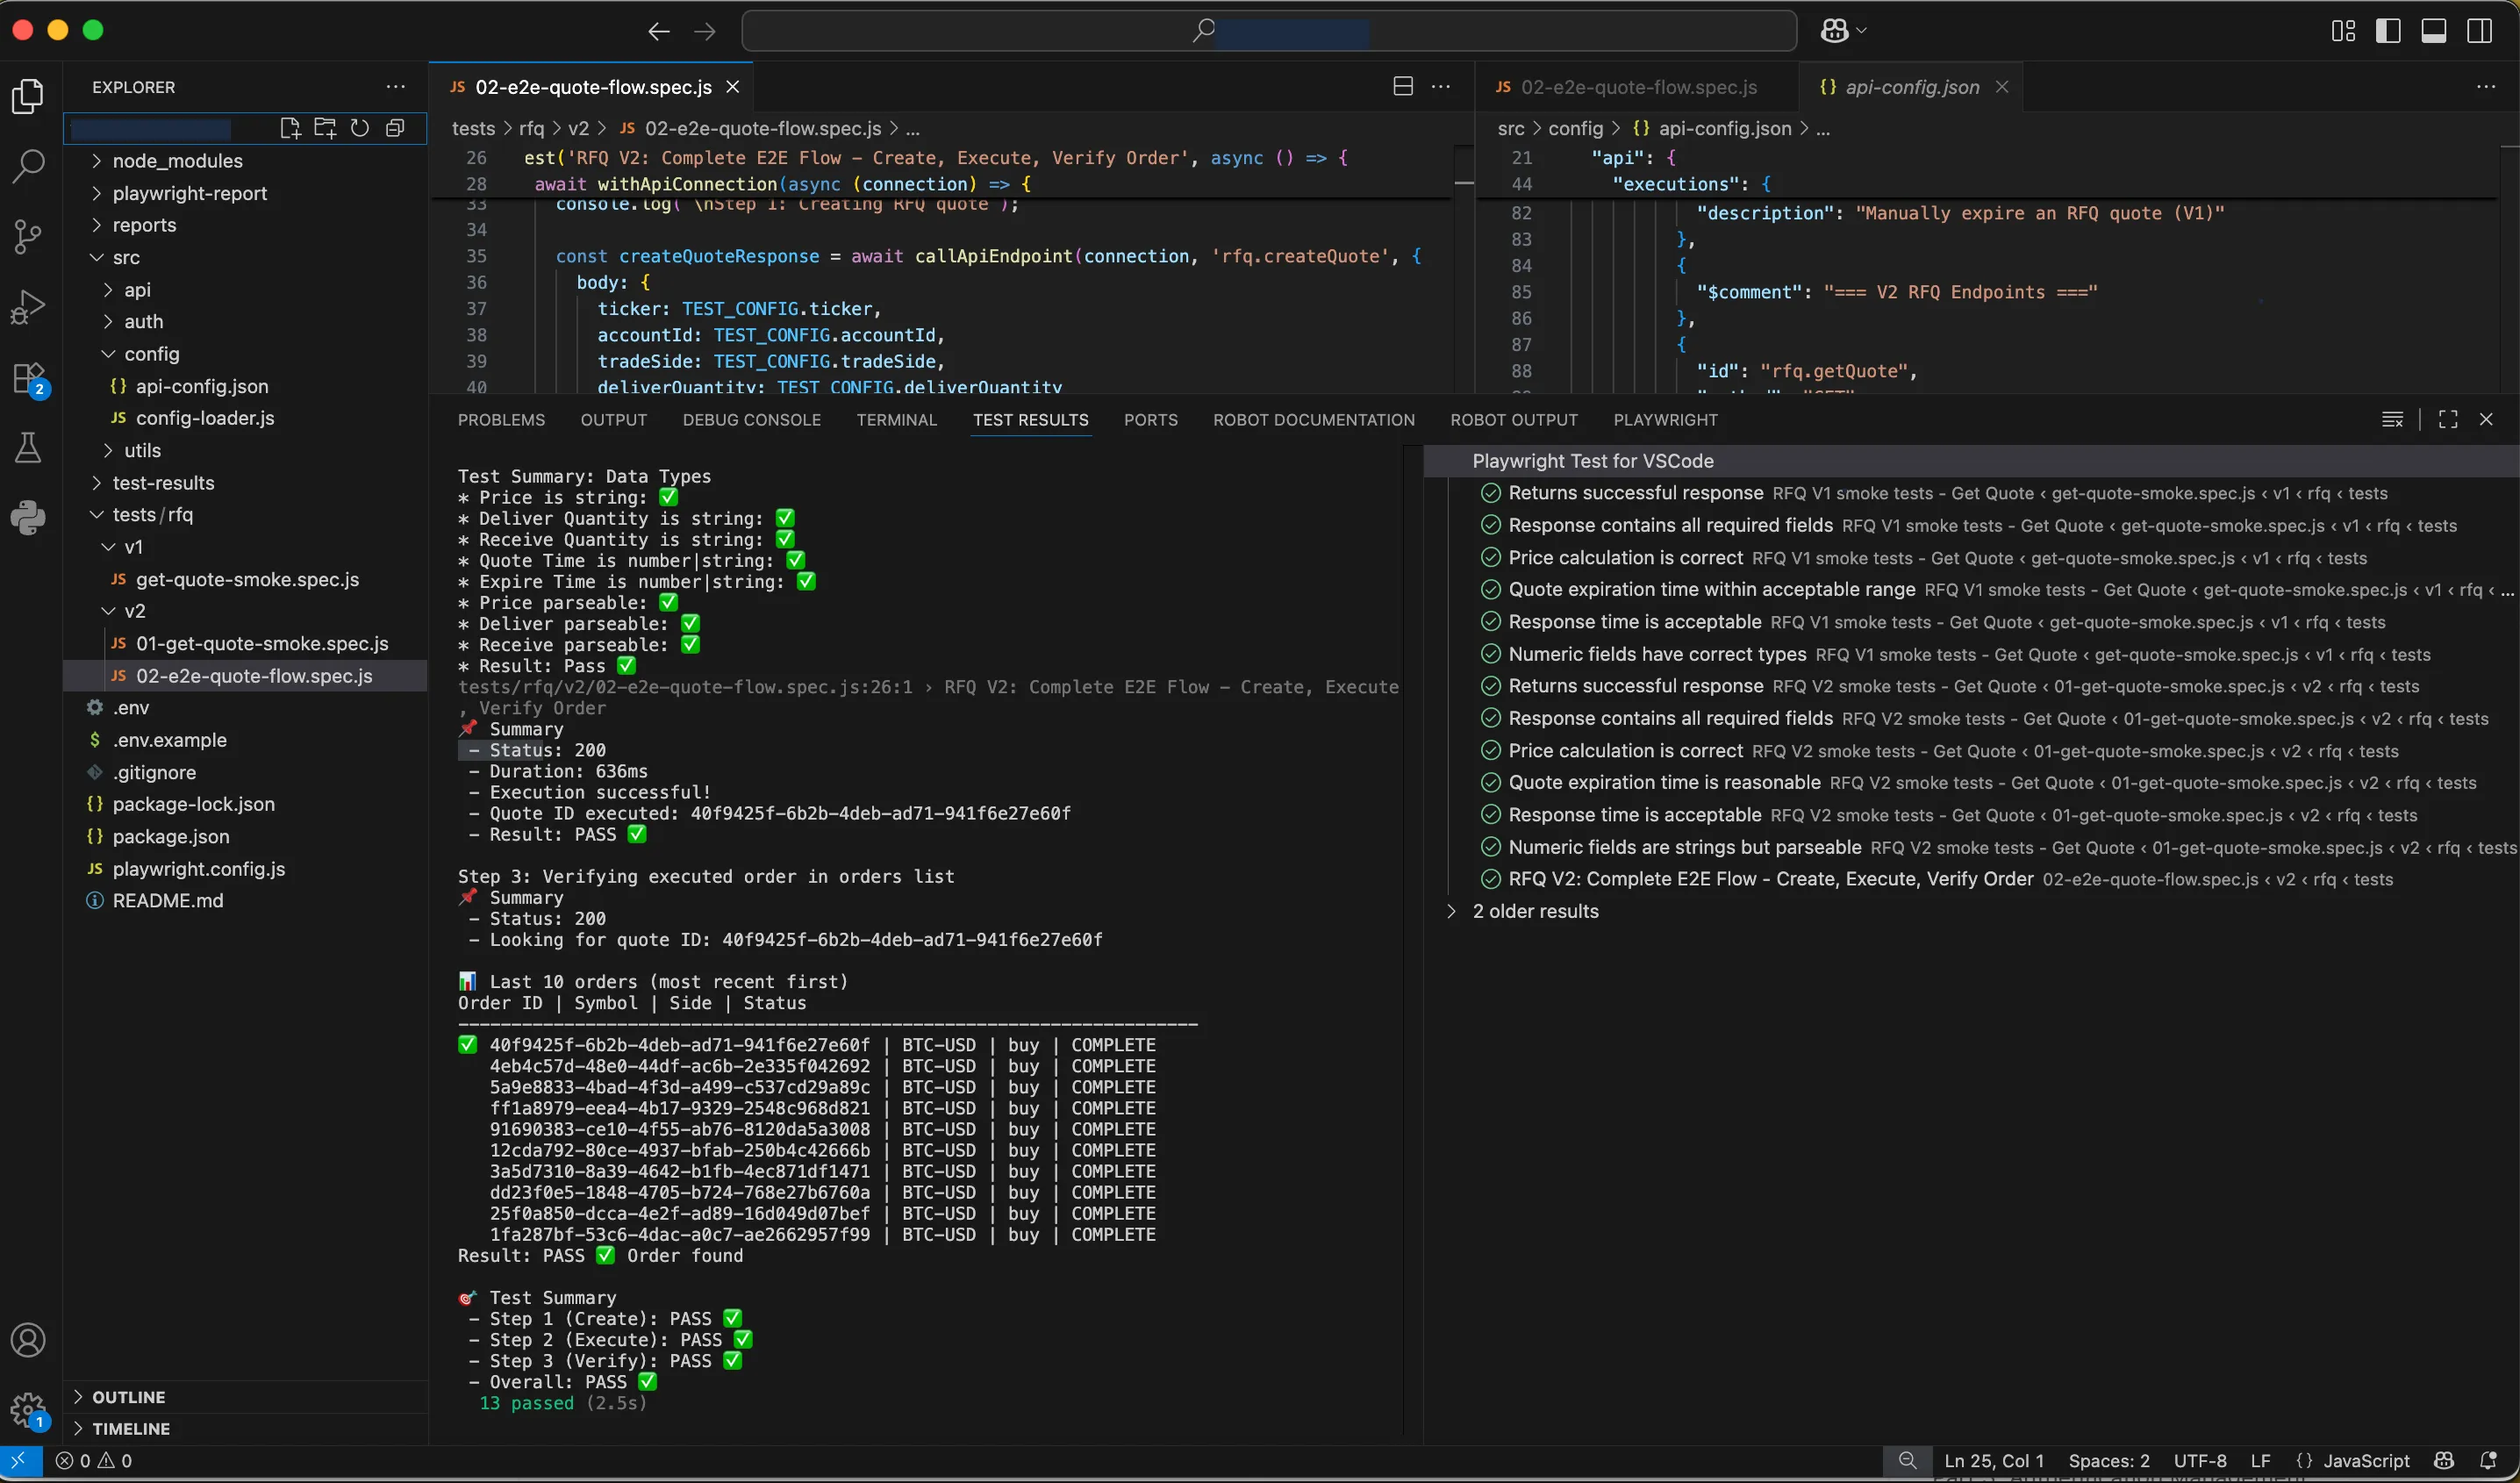 Test output showing a complete RFQ trading flow with automatic authentication, timing, and structured logging
Why This Framework Approach?
Section titled “Why This Framework Approach?”While Playwright excels at browser automation, its API testing capabilities are equally powerful but often overlooked. Unlike simple HTTP client libraries, Playwright provides:
- Built-in request context management for session handling
- Automatic retry mechanisms for flaky network conditions
- Comprehensive debugging tools with trace capture
- Parallel execution out of the box
- Rich assertion library designed for testing
The framework we’ll build leverages these strengths while adding enterprise-grade patterns for authentication, configuration, and maintainability.
The Problem: When Simple API Tests Become Complex
Section titled “The Problem: When Simple API Tests Become Complex”Let’s start with what most API testing looks like initially:
// Early-stage API test - looks simple, but problems lurk beneathtest('get user balance', async ({ request }) => {  const response = await request.get('https://api-staging.cryptotrade.io/users/v1/balance', {    headers: {      'Authorization': 'Bearer your-token-here',      'Content-Type': 'application/json'    }  });
  expect(response.status()).toBe(200);  const data = await response.json();  expect(data.balance).toBeGreaterThan(0);});
This works… until it doesn’t. Here are the pain points that emerge:
Environment Management Chaos
- Hardcoded URLs make switching between dev/staging/prod painful
- Different teams use different endpoints
- Configuration scattered across multiple files
Authentication Complexity
- API keys, HMAC signatures, and tokens copied everywhere
- Security credentials accidentally committed to repositories
- Authentication logic duplicated across test files
Maintenance Overhead
- Endpoint changes break tests in unpredictable places
- No single source of truth for API structure
- Debugging failing tests requires digging through multiple files
Team Collaboration Issues
- New team members struggle to add tests
- Inconsistent patterns across different test authors
- No clear guidelines for test organization
The Solution: Architecture-Driven Testing
Section titled “The Solution: Architecture-Driven Testing”The framework we’ll build addresses these challenges through:
- Centralized Configuration: Single source of truth for environments and endpoints
- Modular Authentication: Secure, reusable authentication handling
- Clean Abstractions: Simple APIs that hide complexity
- Comprehensive Logging: Debug-friendly request/response tracking
- Scalable Organization: Patterns that grow with your team
By the end of this guide, your tests will look like this:
test('get user balance', async () => {  await withApiConnection(async (connection) => {    const response = await callApiEndpoint(connection, 'users.getBalance', {      enableDetailedLogs: true    });
    expect(response.statusCode).toBe(200);    expect(response.data.balance).toBeGreaterThan(0);  });});
Clean, readable, and maintainable. Let’s build it step by step.
Foundation: Basic API Testing Setup
Section titled “Foundation: Basic API Testing Setup”Before diving into the advanced patterns, let’s establish the foundation. We’ll start with a basic Playwright project and gradually add sophistication.
Initial Project Setup
Section titled “Initial Project Setup”First, create a new Playwright project focused on API testing:
npm init -ynpm install --save-dev @playwright/test dotenvnpx playwright installCreate a basic project structure:
project-root/├── src/│ ├── api/│ ├── auth/│ └── config/├── tests/│ └── api/├── package.json└── playwright.config.jsBasic Playwright Configuration
Section titled “Basic Playwright Configuration”Start with a minimal playwright.config.js optimized for API testing:
module.exports = {  testDir: './tests',  timeout: 30000,  expect: { timeout: 5000 },
  // API testing doesn't need browsers  use: {    baseURL: process.env.API_BASE_URL || 'https://api-staging.cryptotrade.io',    extraHTTPHeaders: {      'Accept': 'application/json'    }  },
  // Optimize for API testing  projects: [    {      name: 'api-tests',      testMatch: /.*\.api\.spec\.js/    }  ]};
Your First Structured API Test
Section titled “Your First Structured API Test”Let’s create a simple test that demonstrates the problems we’re solving:
const { test, expect } = require('@playwright/test');
test.describe('User Balance API', () => {  test('should return user balance', async ({ request }) => {    // Problem 1: Hardcoded authentication    const apiKey = process.env.API_KEY;    const apiSecret = process.env.API_SECRET;
    // Problem 2: Manual signature generation (simplified)    const timestamp = Date.now().toString();    const signature = generateSignature(apiKey, apiSecret, timestamp);
    // Problem 3: Hardcoded endpoint    const response = await request.get('/users/v1/balance', {      headers: {        'x-api-key': apiKey,        'x-timestamp': timestamp,        'x-signature': signature      }    });
    expect(response.status()).toBe(200);    const data = await response.json();    expect(data.balance).toBeDefined();  });});
// Problem 4: Utility functions scattered everywherefunction generateSignature(apiKey, secret, timestamp) {  // Simplified - real implementation would be more complex  return require('crypto')    .createHmac('sha256', secret)    .update(`${apiKey}${timestamp}`)    .digest('hex');}
This test works, but notice the issues:
- Authentication logic mixed with test logic
- No reusability between tests
- Hardcoded paths and endpoints
- Utility functions in test files
What’s Next?
Section titled “What’s Next?”In the following sections, we’ll systematically address each of these problems:
- Architecture & Separation of Concerns - Extract reusable components
- Authentication Module - Secure, centralized auth handling
- Configuration Management - Environment and endpoint management
- Advanced Patterns - Logging, error handling, and debugging
- Real-World Testing - End-to-end flow validation
Each section builds upon the previous, transforming our basic test into a maintainable, scalable framework that handles the complexity of modern API testing.
Part 2: Architecture & Separation of Concerns
Section titled “Part 2: Architecture & Separation of Concerns”The key to a maintainable API testing framework is separating different responsibilities into focused modules. Let’s extract the complexity from our test and create reusable components.
The Core Architecture
Section titled “The Core Architecture”We’ll organize our framework into three main layers:
src/├── api/ # API request handling│ └── make-api-request.js├── auth/ # Authentication logic│ └── api-key-auth.js└── config/ # Configuration management ├── config-loader.js └── api-config.jsonThis separation allows each module to have a single responsibility and makes testing much easier.
graph LR
    T[Test] --> W[withApiConnection]
    W --> C[callApiEndpoint]
    C --> G[getEndpoint]
    C --> B[buildRequestHeaders]
    G --> CONFIG[api-config.json]
    B --> AUTH{requiresAuth?}
    AUTH -->|Yes| S[buildSignedHeaders]
    AUTH -->|No| H[Basic Headers]
    S --> R[HTTP Request]
    H --> R
    R --> P[parseResponse]
    P --> RESULT[Response Object]
Step 1: Extract API Request Logic
Section titled “Step 1: Extract API Request Logic”First, let’s create a clean abstraction for making API requests. This will handle connection management and provide a consistent interface:
const { request } = require('@playwright/test');
/** * Set up API connection context, execute callback, then clean up. */async function withApiConnection(callback) {    const connection = await request.newContext({        baseURL: config.apiBaseUrl,        timeout: config.timeoutMs,    });
    try {        return await callback(connection, config);    } finally {        await connection.dispose(); // Always clean up    }}
/** * Call a configured API endpoint with automatic method resolution. */async function callApiEndpoint(connection, endpointId, settings = {}) {    const endpointInfo = getEndpoint(endpointId);    const methodToUse = settings.method || endpointInfo.method;
    // Build request (URL, headers, auth, body)    const response = await connection.fetch(fullUrl, requestOptions);
    return {        statusCode: response.status(),        data: await parseResponse(response),        duration: Date.now() - startTime    };}
module.exports = { withApiConnection, callApiEndpoint };
Key improvements:
- Configuration-driven: Methods and paths come from config, not hardcoded
- Connection management: Automatic setup and cleanup
- Flexible parameters: Support for URL params, headers, and body
- Smart defaults: Automatic Content-Type for JSON objects
- Built-in logging: Optional detailed request/response tracking
Step 2: Configuration-First Approach
Section titled “Step 2: Configuration-First Approach”The key insight is using endpoint IDs instead of raw URLs and methods. This comes from our configuration:
// Example: How endpoint configuration worksconst endpointInfo = getEndpoint('users.getBalance');// Returns: {// id: 'users.getBalance',// method: 'GET',// path: '/users/v1/balance',// requiresAuth: true// }This means tests never need to know HTTP methods—they’re defined once in configuration.
Step 2.5: Configuration Structure Example
Section titled “Step 2.5: Configuration Structure Example”To understand how the endpoint IDs work, let’s look at the actual configuration structure:
{ "environments": { "default": "stage", "dev": { "apiBaseUrl": "https://api-dev.cryptotrade.io", "timeoutMs": 50000 }, "stage": { "apiBaseUrl": "https://api-staging.cryptotrade.io", "timeoutMs": 30000 }, "prod": { "apiBaseUrl": "https://api.cryptotrade.io", "timeoutMs": 20000 } }, "api": { "userBalances": { "description": "User balance information endpoints", "endpoints": [ { "id": "users.getBalance", "method": "GET", "path": "/users/v1/balance", "requiresAuth": true, "description": "Get user account balance" } ] }, "trades": { "description": "Trading execution endpoints", "endpoints": [ { "id": "trades.createQuote", "method": "POST", "path": "/trades/v2/createQuote", "requiresAuth": true, "headers": { "Content-Type": "application/json" }, "description": "Create executable trading quote" }, { "id": "trades.executeQuote", "method": "POST", "path": "/trades/v2/executeQuote", "requiresAuth": true, "description": "Execute a previously created quote" }, { "id": "trades.expireQuote", "method": "PUT", "path": "/trades/v2/expireQuote", "requiresAuth": true, "description": "Manually expire a quote" } ] } }}Environment Management:
- Switch environments with
ENV=prod npm test - Default fallback to ‘stage’ environment
- Different timeouts per environment
Endpoint Organization:
- Grouped by functional area (
userBalances,trades) - Unique IDs using dot notation (
trades.createQuote) - Method and path defined once, used everywhere
- Authentication requirements clearly marked
- Built-in documentation with descriptions
This structure allows you to:
// Environment automatically selectedconst config = getEnvConfig();// → { name: 'stage', apiBaseUrl: 'https://api-staging...', timeoutMs: 30000 }
// Endpoint details retrieved by IDconst endpoint = getEndpoint('trades.createQuote');// → { method: 'POST', path: '/trades/v2/createQuote', requiresAuth: true }
Step 3: Transform Your Test
Section titled “Step 3: Transform Your Test”Now our test becomes much cleaner and more declarative:
// tests/api/balance.api.spec.js - AFTER refactoringconst { test, expect } = require('@playwright/test');const { withApiConnection, callApiEndpoint } = require('../../src/api/make-api-request');
test.describe('User Balance API', () => {  test('should return user balance', async () => {    await withApiConnection(async (connection) => {      // Method comes from config - no need to specify 'GET'      const response = await callApiEndpoint(connection, 'users.getBalance', {        enableDetailedLogs: true      });
      expect(response.statusCode).toBe(200);      expect(response.data.balance).toBeDefined();    });  });
  test('should create trade quote', async () => {    await withApiConnection(async (connection) => {      // Method 'POST' comes from config automatically      const response = await callApiEndpoint(connection, 'trades.createQuote', {        body: {          ticker: 'BTC-USD',          tradeSide: 'buy',          deliverQuantity: '1000'        }      });
      expect(response.statusCode).toBe(200);      expect(response.data.quoteId).toBeTruthy();    });  });});
What we’ve gained:
- Declarative tests: Focus on what you’re testing, not how
- Configuration-driven: Endpoints defined once, used everywhere
- Method-agnostic: Tests don’t care about HTTP verbs
- Consistent interface: Same pattern for GET, POST, PUT, DELETE
- Built-in debugging: Optional detailed logging for any request
Step 4: Pattern Benefits
Section titled “Step 4: Pattern Benefits”This architectural pattern provides several immediate benefits:
Zero HTTP Knowledge Required
Section titled “Zero HTTP Knowledge Required”New team members can write tests without knowing REST conventions:
// Clear intent - no HTTP knowledge neededawait callApiEndpoint(connection, 'trades.expireQuote', { body: { quoteId: 'abc-123' }});Configuration Changes Don’t Break Tests
Section titled “Configuration Changes Don’t Break Tests”If an endpoint changes from GET to POST, only the config file needs updating:
// api-config.json change affects all tests automatically{ "id": "users.getBalance", "method": "POST", // Changed from GET - all tests still work "path": "/users/v2/balance"}Flexible Parameter Handling
Section titled “Flexible Parameter Handling”The same interface handles different request types seamlessly:
// URL parameters for GET requestsawait callApiEndpoint(connection, 'orders.list', {  urlParams: { limit: '10', status: 'active' }});
// Body for POST requestsawait callApiEndpoint(connection, 'orders.create', {  body: { symbol: 'BTC-USD', quantity: '1.5' }});
// Extra headers when neededawait callApiEndpoint(connection, 'admin.getData', {  extraHeaders: { 'X-Admin-Token': 'special-token' }});
Common Pitfalls to Avoid
Section titled “Common Pitfalls to Avoid”❌ Don’t hardcode methods in tests:
// Wrong - defeats the configuration purposeawait callApiEndpoint(connection, 'users.getBalance', { method: 'GET' // Should come from config});✅ Trust the configuration:
// Right - let config determine methodawait callApiEndpoint(connection, 'users.getBalance', { enableDetailedLogs: true});❌ Don’t put business logic in the request layer:
// Wrong - validation belongs in tests or higher layersfunction callApiEndpoint(connection, endpointId, settings) { if (endpointId.includes('balance') && !settings.accountId) { throw new Error('Balance requires accountId'); }}✅ Keep it focused on HTTP concerns:
// Right - pure request/response handlingfunction callApiEndpoint(connection, endpointId, settings) { const endpointInfo = getEndpoint(endpointId); return makeRequest(connection, endpointInfo, settings);}What’s Next?
Section titled “What’s Next?”We’ve established clean, configuration-driven request handling, but we still have a gap in authentication. In the next section, we’ll tackle Authentication Management by creating a secure, reusable auth module that handles complex signature generation and credential management.
The beauty of our current architecture is that adding authentication won’t require any test changes—it will be completely transparent to the test layer.
Part 3: Authentication Management
Section titled “Part 3: Authentication Management”Most APIs require authentication, and financial/trading APIs often use complex signature-based authentication for security. Let’s build a robust authentication system that handles HMAC signatures while keeping tests simple and secure.
The Authentication Challenge
Section titled “The Authentication Challenge”Many APIs use more than just API keys. Our trading API requires HMAC-SHA384 signatures with specific payload formatting:
// What we DON'T want in every testconst nonce = Date.now().toString();const signaturePayload = {  httpMethod: 'POST',  path: '/trades/v2/createQuote',  nonce: nonce};const signature = crypto  .createHmac('sha384', process.env.API_SECRET)  .update(JSON.stringify(signaturePayload))  .digest('hex');
const headers = {  'x-api-key': process.env.API_KEY,  'x-nonce': nonce,  'x-signature': signature};
This complexity belongs in a dedicated authentication module, not scattered across tests.
sequenceDiagram
    participant Test
    participant Framework
    participant Config
    participant Auth
    participant API

    Test->>Framework: callApiEndpoint('trades.createQuote')
    Framework->>Config: getEndpoint()
    Config-->>Framework: {method, path, requiresAuth: true}
    Framework->>Auth: buildSignedHeaders()
    Auth-->>Framework: {x-api-key, x-nonce, x-signature}
    Framework->>API: POST /trades/v2/createQuote
    API-->>Framework: 200 {quoteId: 'abc-123'}
    Framework-->>Test: {statusCode: 200, data: {...}}
Step 1: Create Authentication Module
Section titled “Step 1: Create Authentication Module”Let’s build a secure, reusable authentication handler:
const crypto = require('crypto');
/** * Build signed headers for API authentication using HMAC-SHA384. * * Based on trading API documentation: * 1. Create payload: { httpMethod, path, nonce } * 2. JSON.stringify the payload * 3. HMAC-SHA384(apiSecret, stringifiedPayload) * 4. Add headers: x-nonce, x-api-key, x-signature */function buildSignedHeaders({ method, path, apiKey, apiSecret, nonce, extraHeaders = {} }) {  if (!apiKey || !apiSecret) {    throw new Error('Missing API credentials. Ensure API_KEY and API_SECRET are set.');  }
  const httpMethod = method.toUpperCase();  const requestNonce = nonce || Date.now().toString();
  // Create signature payload exactly as API documentation specifies  const signaturePayload = {    httpMethod,    path,    nonce: requestNonce  };
  const signatureContent = JSON.stringify(signaturePayload);
  const signature = crypto    .createHmac('sha384', apiSecret)    .update(signatureContent)    .digest('hex');
  return {    'x-nonce': requestNonce,    'x-api-key': apiKey,    'x-signature': signature,    ...extraHeaders  };}
module.exports = { buildSignedHeaders };
Key features:
- Exact API compliance: Follows the trading API’s signature requirements
- Flexible nonce handling: Auto-generate or provide custom nonce for testing
- Error handling: Clear error messages for missing credentials
- Header merging: Combines auth headers with any additional headers
Step 2: Integrate Authentication into Request Handler
Section titled “Step 2: Integrate Authentication into Request Handler”Now let’s update our request handler to automatically apply authentication. We only need to modify a few key parts:
// src/api/make-api-request.js - Add authentication imports and constantsconst { buildSignedHeaders } = require('../auth/api-key-auth');
const API_KEY = process.env.API_KEY;const API_SECRET = process.env.API_SECRET;
The main change is in the buildRequestHeaders function:
/** Build complete request headers including authentication */function buildRequestHeaders(endpointInfo, method, extraHeaders = {}) {  let headers = { ...(endpointInfo.headers || {}) };  headers = { ...headers, ...extraHeaders };
  // Apply authentication if endpoint requires it  if (endpointInfo.requiresAuth) {    headers = buildSignedHeaders({      method,      path: endpointInfo.path,      apiKey: API_KEY,      apiSecret: API_SECRET,      extraHeaders: headers,    });  }
  return headers;}
And update the logging to protect sensitive information:
function logRequestDetails({ endpointId, method, fullUrl, headers, body }) { console.log('\n🔍 REQUEST DETAILS'); console.log(` - Endpoint ID: ${endpointId}`); console.log(` - Method: ${method}`); console.log(` - URL: ${fullUrl}`); // Don't log sensitive auth headers in production if (body) console.log('📦 Request Body:', JSON.stringify(body, null, 2));}Authentication integration highlights:
- Automatic application: Authentication added when
requiresAuth: truein config - Transparent to tests: Tests don’t need to know about auth complexity
- Secure logging: Sensitive headers excluded from debug output
- Error propagation: Auth errors bubble up with clear messages
Step 3: Environment Variable Setup
Section titled “Step 3: Environment Variable Setup”For secure credential management, create a .env file (never commit this):
# .env - Keep this file out of version control!API_KEY=your_api_key_hereAPI_SECRET=your_api_secret_hereENV=stageAnd ensure your project loads environment variables:
// At the top of make-api-request.jsrequire('dotenv').config();Add to .gitignore:
.env.env.local.env.*.localStep 4: Tests Become Authentication-Agnostic
Section titled “Step 4: Tests Become Authentication-Agnostic”Now your tests are completely free from authentication concerns:
const { test, expect } = require('@playwright/test');const { withApiConnection, callApiEndpoint } = require('../../src/api/make-api-request');
test.describe('Trading API', () => {  test('should create and execute quote', async () => {    await withApiConnection(async (connection) => {      // Step 1: Create quote - authentication handled automatically      const createResponse = await callApiEndpoint(connection, 'trades.createQuote', {        body: {          ticker: 'BTC-USD',          accountId: 'TEST123',          tradeSide: 'buy',          deliverQuantity: '1000'        }      });
      expect(createResponse.statusCode).toBe(200);      const quoteId = createResponse.data.data.quoteId;      expect(quoteId).toBeTruthy();
      // Step 2: Execute quote - different endpoint, same auth pattern      const executeResponse = await callApiEndpoint(connection, 'trades.executeQuote', {        body: { quoteId, accountId: 'TEST123' }      });
      expect(executeResponse.statusCode).toBe(200);      expect(executeResponse.data.data.quoteId).toBe(quoteId);    });  });
  test('should get user balance', async () => {    await withApiConnection(async (connection) => {      // GET request - authentication still automatic      const response = await callApiEndpoint(connection, 'users.getBalance');
      expect(response.statusCode).toBe(200);      expect(response.data.balance).toBeDefined();    });  });});
What we’ve achieved:
- Zero auth code in tests: Complete abstraction of complex authentication
- Consistent security: Every authenticated endpoint uses the same secure method
- Easy debugging: Optional detailed logging shows auth headers when needed
- Environment flexibility: Easy credential switching between environments
Step 5: Testing Authentication Edge Cases
Section titled “Step 5: Testing Authentication Edge Cases”The modular design makes it easy to test authentication scenarios:
const { test, expect } = require('@playwright/test');const { buildSignedHeaders } = require('../../src/auth/api-key-auth');
test.describe('Authentication', () => {  test('should generate valid signature', () => {    const headers = buildSignedHeaders({      method: 'POST',      path: '/trades/v2/createQuote',      apiKey: 'test-key',      apiSecret: 'test-secret',      nonce: '1234567890'    });
    expect(headers['x-api-key']).toBe('test-key');    expect(headers['x-nonce']).toBe('1234567890');    expect(headers['x-signature']).toMatch(/^[a-f0-9]{96}$/); // SHA384 hex length  });
  test('should handle missing credentials gracefully', () => {    expect(() => {      buildSignedHeaders({        method: 'GET',        path: '/test',        apiKey: '',        apiSecret: 'secret'      });    }).toThrow('Missing API credentials');  });});
Security Best Practices
Section titled “Security Best Practices”✅ Do:
- Store credentials in environment variables
- Use
.envfiles for local development - Add
.envto.gitignore - Use different credentials per environment
- Log requests but exclude sensitive headers
❌ Don’t:
- Hardcode credentials in source code
- Commit
.envfiles to version control - Log authentication headers in production
- Share credentials between environments
- Store secrets in configuration files
Common Authentication Patterns
Section titled “Common Authentication Patterns”The modular approach supports various auth types:
// Easy to extend for different auth methodsfunction buildBearerHeaders(token, extraHeaders = {}) {  return {    'Authorization': `Bearer ${token}`,    ...extraHeaders  };}
function buildBasicAuthHeaders(username, password, extraHeaders = {}) {  const credentials = Buffer.from(`${username}:${password}`).toString('base64');  return {    'Authorization': `Basic ${credentials}`,    ...extraHeaders  };}
What’s Next?
Section titled “What’s Next?”We now have secure, transparent authentication that works across all endpoints.
The beauty of our current architecture is that authentication is completely invisible to test authors while being fully configurable and secure.
Part 4: Real-World Testing - End-to-End Flow Patterns
Section titled “Part 4: Real-World Testing - End-to-End Flow Patterns”Now that we have our foundation in place, let’s explore how to design sophisticated, real-world test scenarios. We’ll examine the patterns and architectural decisions needed for complex API workflows, using a financial trading flow as our example.
flowchart LR
    START([Test Start]) --> CREATE[Create Quote]
    CREATE --> EXTRACT[Extract quoteId]
    EXTRACT --> EXECUTE[Execute Quote]
    EXECUTE --> VERIFY[Verify Order]
    VERIFY --> END([Test Complete])

    CREATE -.-> TIMEOUT{Quote Expired?}
    TIMEOUT -->|Yes| FAIL([Test Fail])
    TIMEOUT -->|No| EXECUTE
Missing Pieces (Brief Overview)
Section titled “Missing Pieces (Brief Overview)”Before diving into advanced patterns, we’ve built most of our framework but haven’t detailed a few supporting components:
Config Loader Implementation:
// src/config/config-loader.js - Handles endpoint lookup and environment selectionfunction getEnvConfig() {  // Reads api-config.json, selects environment based on process.env.ENV}
function getEndpoint(endpointId) {  // Recursively searches api-config.json for endpoint by ID  // Returns: { id, method, path, requiresAuth, headers, description }}
These utilities power our callApiEndpoint() function by translating endpoint IDs into HTTP details. The implementation involves JSON traversal and environment selection logic.
Complex API Flow Challenges
Section titled “Complex API Flow Challenges”Real-world API testing involves workflows that span multiple endpoints with interdependent data. Consider a trading scenario:
- Request a price quote → Returns time-sensitive pricing
- Execute the trade → Must happen before quote expires
- Verify the result → Confirm trade appears in system
This presents several architectural challenges:
Challenge 1: Data Flow Between Requests
Section titled “Challenge 1: Data Flow Between Requests”// Anti-pattern: Hardcoded valuestest('trading flow', async () => { const quoteResponse = await callApiEndpoint(connection, 'rfq.createQuote', { body: { ticker: 'BTC-USD', amount: '1000' } });
// Problem: How do we get the quoteId to the next request? const quoteId = /* extract from response somehow */;
const executeResponse = await callApiEndpoint(connection, 'rfq.executeQuote', { body: { quoteId: quoteId } // Data dependency });});Key Pattern: Safe data extraction with fallbacks
// Better: Defensive data extractionconst extractQuoteData = (response) => response?.data?.data ?? {};const quoteData = extractQuoteData(quoteResponse);const quoteId = quoteData.quoteId;
expect(quoteId).toBeTruthy(); // Fail fast if data structure unexpected
Challenge 2: Time-Sensitive Operations
Section titled “Challenge 2: Time-Sensitive Operations”Financial APIs often have strict timing requirements. Quotes expire, rate limits apply, and order windows close.
// Consider: How do you test time-sensitive workflows?const quoteData = extractQuoteData(createResponse);const ttlMs = quoteData.expireTime - quoteData.quoteTime;
// Should you add delays? Validate timing? Handle expiration?
Design Decision: Build timing validation into your test patterns rather than ignoring the temporal aspects.
Challenge 3: Request Pattern Variety
Section titled “Challenge 3: Request Pattern Variety”Different endpoints require different request structures:
// POST with bodyawait callApiEndpoint(connection, 'rfq.createQuote', {  body: { ticker: 'BTC-USD', tradeSide: 'buy', deliverQuantity: '1000' }});
// GET with URL parametersawait callApiEndpoint(connection, 'orders.list', {  urlParams: { accountId: 'TEST001', limit: '10' }});
// PUT with bothawait callApiEndpoint(connection, 'rfq.expireQuote', {  body: { quoteId: 'abc-123' },  extraHeaders: { 'X-Force-Expire': 'true' }});
Framework Benefit: The same interface handles all patterns automatically.
Test Architecture Patterns
Section titled “Test Architecture Patterns”Pattern 1: Configuration-Driven Test Data
Section titled “Pattern 1: Configuration-Driven Test Data”const TEST_CONFIG = { ticker: 'BTC-USD', accountId: 'TEST001', tradeSide: 'buy', deliverQuantity: '1000'};
// Benefits:// - Easy to modify test scenarios// - Clear test intent// - Reusable across similar testsPattern 2: Step-by-Step Validation
Section titled “Pattern 2: Step-by-Step Validation”test('multi-step trading workflow', async () => { await withApiConnection(async (connection) => {
// Step 1: Setup console.log('Step 1: Creating quote'); const createResponse = await callApiEndpoint(/*...*/); validateQuoteCreation(createResponse); // Extract validation logic
// Step 2: Action console.log('Step 2: Executing trade'); const executeResponse = await callApiEndpoint(/*...*/); validateExecution(executeResponse, expectedQuoteId);
// Step 3: Verification console.log('Step 3: Confirming order'); const ordersResponse = await callApiEndpoint(/*...*/); validateOrderAppears(ordersResponse, expectedQuoteId); });});Benefits:
- Clear test progression
- Isolated validation logic
- Easy debugging when steps fail
- Self-documenting test flow
Pattern 3: Graceful Async Handling
Section titled “Pattern 3: Graceful Async Handling”// Real-world consideration: Orders might not appear immediatelyconst findOrderInList = (orders, targetQuoteId) => { return orders.find(order => [order.orderId, order.quoteId, order.rfqQuoteId].includes(targetQuoteId) );};
const foundOrder = findOrderInList(orders, quoteId);if (foundOrder) { console.log('✅ Order found immediately'); expect(foundOrder.status).toBe('executed');} else { console.log('⚠️ Order not yet visible (async processing)'); // Decision: Retry logic? Warning? Test design consideration}Advanced Framework Capabilities
Section titled “Advanced Framework Capabilities”Debugging-Friendly Output
Section titled “Debugging-Friendly Output”// Toggle detailed logging per endpointawait callApiEndpoint(connection, 'rfq.createQuote', { body: tradeData, enableDetailedLogs: true // See full request/response for this call});Performance Monitoring
Section titled “Performance Monitoring”// Built-in timing for SLA validationconsole.log(`Quote creation took ${createResponse.duration}ms`);expect(createResponse.duration).toBeLessThan(2000); // SLA requirementEnvironment Flexibility
Section titled “Environment Flexibility”// Same test, different environments// ENV=dev npm test → hits dev endpoints// ENV=prod npm test → hits production endpoints// Configuration handles all the differencesImplementation Considerations
Section titled “Implementation Considerations”When building your own E2E flows, consider these architectural questions:
Error Handling Strategy
Section titled “Error Handling Strategy”- Should tests fail fast on first error, or collect all failures?
- How do you handle partial successes in multi-step flows?
- What’s your strategy for flaky network conditions?
Test Data Management
Section titled “Test Data Management”- Do you use fixed test data or generate dynamic data?
- How do you handle data cleanup between test runs?
- What’s your approach to test isolation?
Assertion Patterns
Section titled “Assertion Patterns”// Business logic assertions vs HTTP assertionsexpect(response.statusCode).toBe(200); // HTTP levelexpect(response.data.quoteId).toBeTruthy(); // Data structureexpect(parseFloat(response.data.price)).toBeGreaterThan(0); // Business logicTest Organization
Section titled “Test Organization”// How do you structure complex test suites?test.describe('RFQ Trading Flows', () => { test.describe('Happy Path Scenarios', () => { test('buy order execution', async () => {}); test('sell order execution', async () => {}); });
test.describe('Edge Cases', () => { test('expired quote handling', async () => {}); test('insufficient balance scenarios', async () => {}); });});Key Architectural Decisions
Section titled “Key Architectural Decisions”1. Abstraction Level
Section titled “1. Abstraction Level”Our framework abstracts HTTP details but preserves business logic visibility. Tests read like business workflows, not technical protocols.
2. Configuration-Driven Design
Section titled “2. Configuration-Driven Design”Endpoint changes require config updates, not code changes. This scales much better for large APIs with frequent updates.
3. Authentication Transparency
Section titled “3. Authentication Transparency”Complex HMAC signatures happen automatically. Tests focus on business logic, not security implementation details.
4. Debugging Support
Section titled “4. Debugging Support”Optional detailed logging provides immediate visibility into request/response patterns without cluttering normal test output.
Next Steps for Your Implementation
Section titled “Next Steps for Your Implementation”-
Start with your most critical business flow - implement end-to-end testing for your highest-value API workflow
-
Build validation helpers - extract common assertion patterns into reusable functions
-
Add retry strategies - handle network flakiness and async processing delays appropriately
-
Implement test data patterns - decide on your approach to test data generation and cleanup
-
Monitor performance - use the built-in timing to establish SLA baselines
-
Expand coverage - add edge cases and error scenarios once happy path is solid
Conclusion
Section titled “Conclusion”The framework we’ve built transforms complex API testing from a technical challenge into a strategic advantage. By abstracting infrastructure concerns, your tests become:
- Business-focused rather than technically focused
- Maintainable through configuration-driven design
- Debuggable with built-in observability
- Scalable across teams and environments
The patterns shown here provide a foundation for testing sophisticated API workflows while maintaining code clarity and test reliability.
Remember: The goal isn’t just working tests—it’s building a testing approach that grows with your API and enables your team to test confidently at any scale. 🚀
Official Playwright Documentation References
Section titled “Official Playwright Documentation References”- Official Playwright API Testing Documentation: Comprehensive guide to getting started, writing tests, and using request contexts
- Configuration Options: Details on baseURL, headers, timeouts, and global setup options
- Request Context Management: Advanced authentication patterns, session handling, and request isolation
- APIRequestContext Class Reference: Complete API documentation for methods like
fetch(),get(),post(), and context disposal - Test Hooks and Fixtures: Best practices for test setup, teardown, and custom fixtures
- Authentication Guide: Patterns for handling different authentication methods in API tests